1988 Jeep Grand Wagoneer
MY NEW JEEP ADDITION
The Story of my "new" 1988 Jeep Grand Wagoneer.
Purchased in October 2002 with a dead engine. You could
hear the loose and broken rod inside of the engine as you turn it
by hand back and forth. Fortunately I had picked up Paul Burk's
FREE '84 360 engine a couple years prior. Either I am a junk
collector, like wife says, or fate causes me to do things for a reason.
I prefer the latter explanation. :-)
I have wanted a rust free FSJ for many years and had basically
given up hope of finding one in the Chicago (AKA rust belt) area.
I saw a lot of ads in the paper and did a lot of looking. Most
of them had almost as much rust as my 82 Wagoneer Limited.
The owner originally wanted $750 for the Jeep, but when asked how
low would he go he said $500. I said I would come to look at it. It
was clean of rust, but had dents or scrapes here and there.
It was not perfect, but would be much easier to restore than my 82
and was the SAME color. We shook hands on the deal and I agreed
to pick it up on Saturday at 10 a.m. I called my tow guy and make
an appointment with him to come tow it at 11 am.
I arrived at 10 a.m., parked in front of it to give the flatbed room
to pull it on the bed but NO OWNER, I call him on my cell phone
and leave message. 10:30 am, no return call nothing. Talk
about getting nervous. I call again at 10:40 a.m. and get the
machine again. WOW now I have a tow truck on the way and nothing
for him to tow. I call again at 10:45 a.m. and now he is answering
the phone and comes outside. Whew! I check the VIN numbers, he
points out what does not work, I pay him, he signs the title over
to me, gives me the keys and it is MINE MINE MINE!!! YAH HA HA!!
Now the fun begins, the tow truck arrives at 11 a.m., on
time I might add, and the GW gets towed to
my garage. I checked out the engine in it and it is BAD, so
now it is time to decide to either just install the 84 engine or tear
it down and do it right. I again chose the latter and torn it
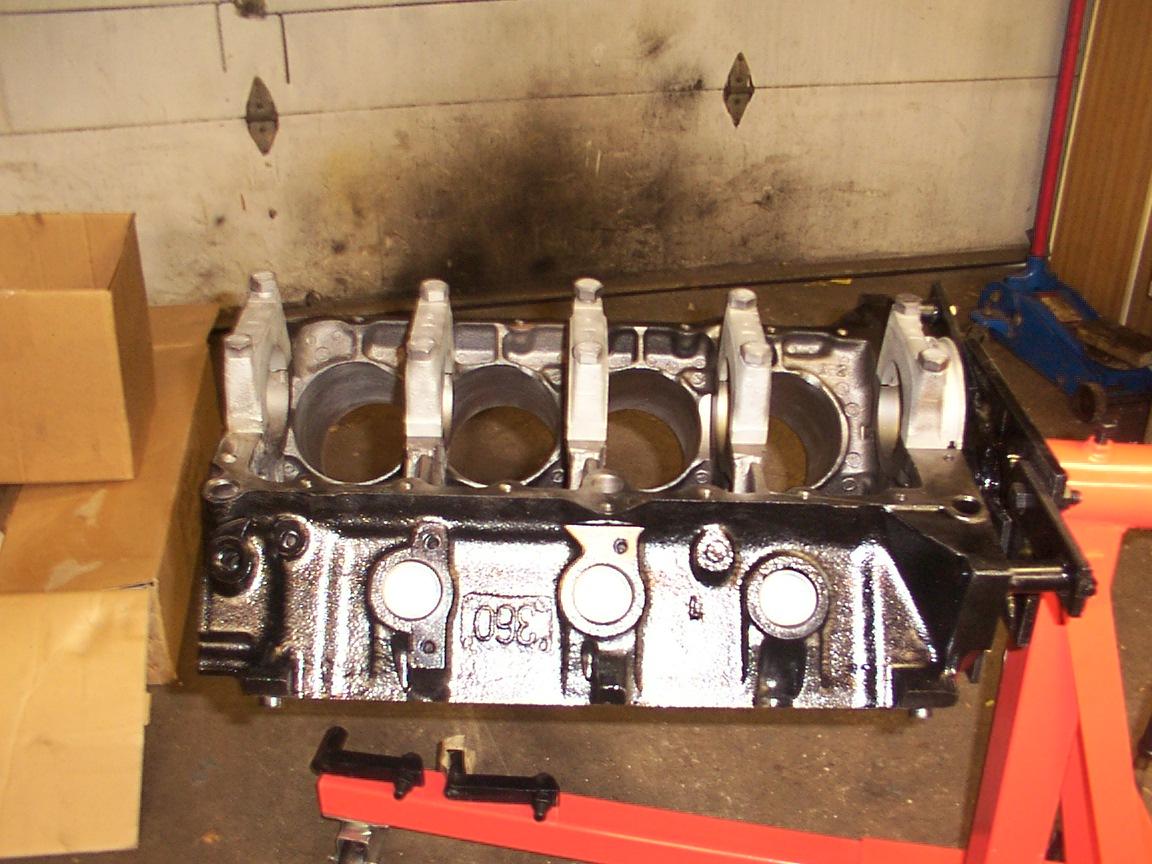
down. There was carbon build up on the pistons along with a ridge
on each cylinder. The engine was very good with no damage to crank
or bearings.
I researched quality parts, esp. the pistons and rings,
and shipped the block with old bearings, crank, rods, and pistons
over to my machine shop. I always believe that the old parts
tell you the story of what is possibly wrong with an engine. In
the case of this engine..........nothing major. I planned to
keep costs down, as I was not in any real rush to have to finish this
engine, but I did not want "cheap" parts to go inside it either.
I told him which pistons and rings I wanted him to order
and to check and polish the standard crankshaft.
I opted for the Skirt Coated Sealed Power Pistons and
their moly rings.
During this time I was looking for the best prices on
the Clevite bearings, a good camshaft kit, oil pump kit, and gasket
set.
I found a new Sealed Power camshaft on Ebay. Bought
it for $29.50!
I then found an entire Engine Rebuild Kit for it that
included the cam shaft kit (SIS cam and lifters), standard rings,
Clevite bearings (all standard size), oil pump kit, timing set, full
gasket set also on Ebay. Bought it too for $145, almost the same
price of a cam kit! Gotta love that Ebay, this was perfect! :-)
I received the newly machined & painted block back
with new freeze plugs installed. It looked good for the small
price of $750, which included the price of premium pistons, rings,
cam bearings, freeze plugs, oil galley plugs machine work and paint!
Oil everything not painted to stop any rust that might form
and keep it covered/bagged when not working on it!
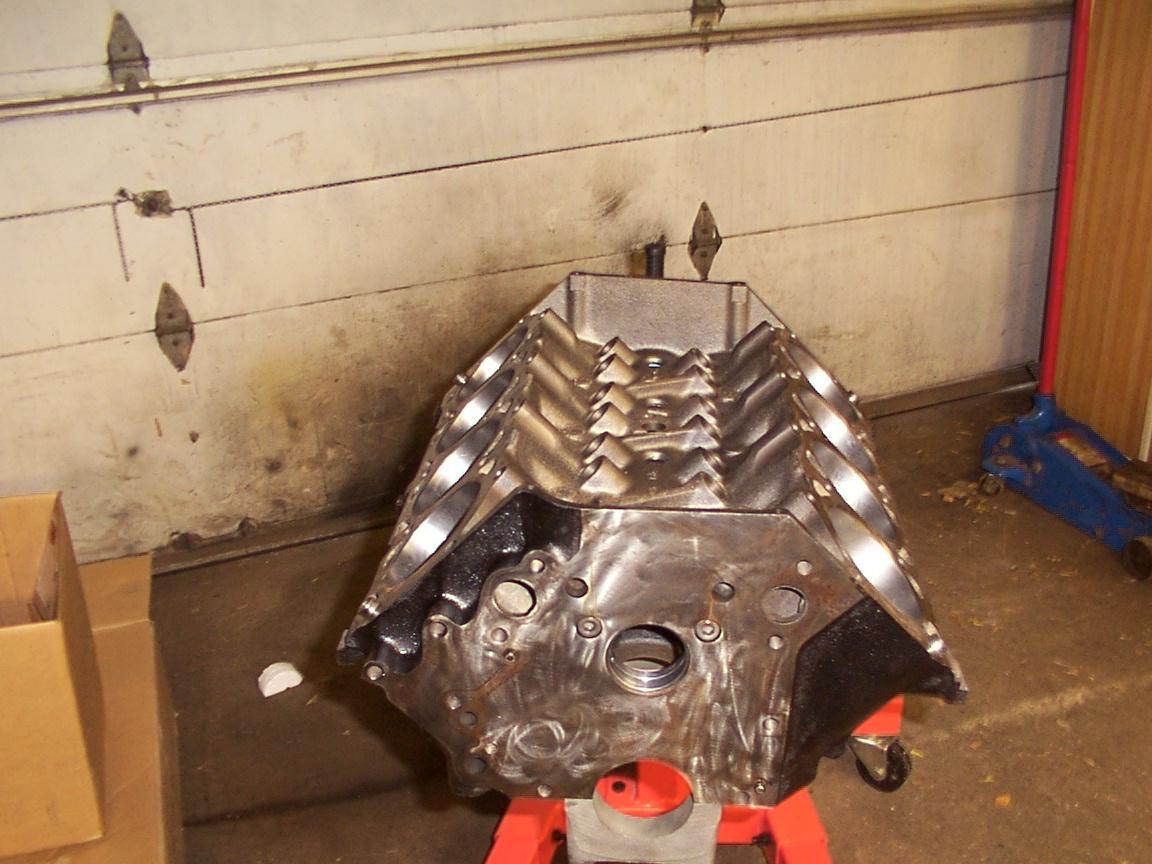
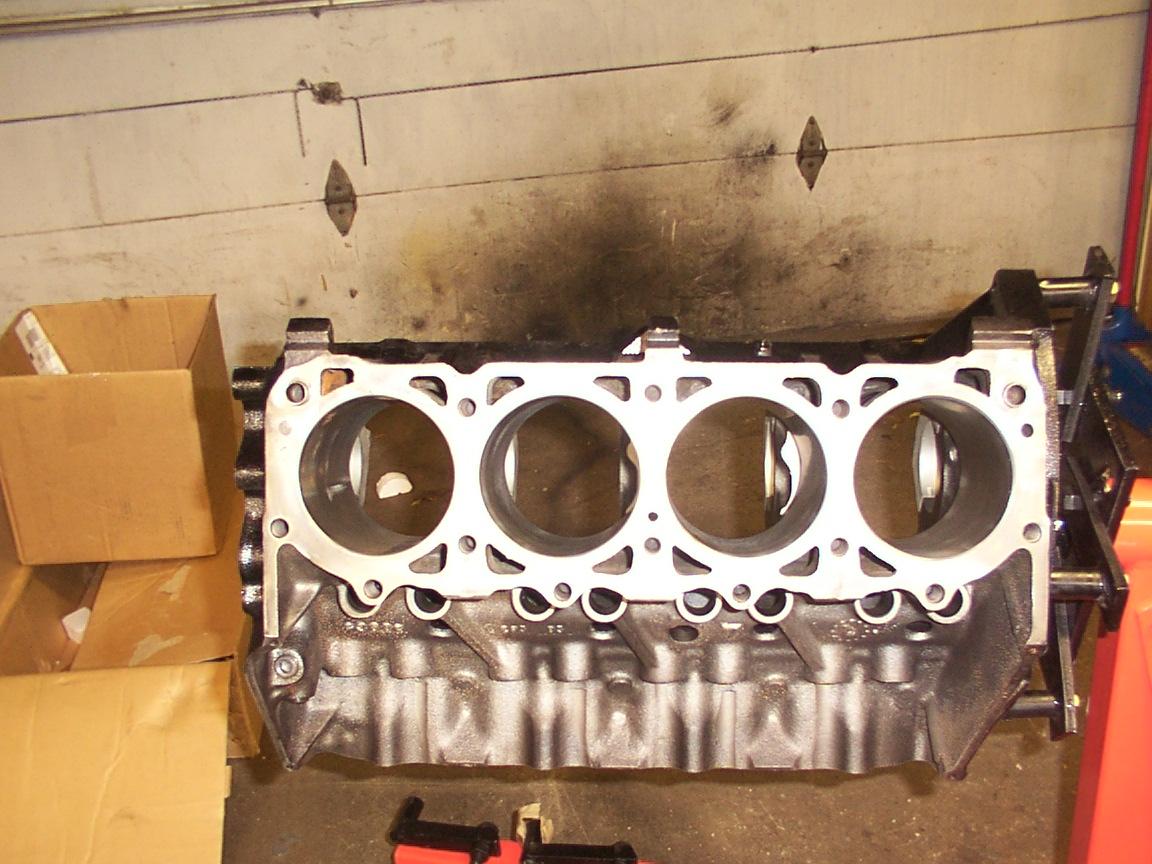
Now it is time to check the ring gap and clean the cylinders and all
passages. All went good!
I started to install main bearings, almost forgetting where
the thrust bearings go. Manuals are worth they
weight in precious metals. Well actually it makes sense
that these bearings go in the middle caps. I am so used to
the VW Beetles and their thrust bearing goes in the front saddle.
<g>
Installed the crank using a mixture of STP and motor oil. It
spun very very easily. OK on to the pistons and rods. I
installed the rings onto the pistons, noted where the top marks go,
spread them out according to the Sealed Power Instructions. I
put the Con Rod Bearings in and installed the pistons them in the block
using rubber hoses on the con rod bolts and a KD Piston Ring Compressor
Tool. Using the STP Oil mixture on the bearings but regular motor
oil on the pistons and cylinders in they went, #8 - #1. I would
do one at a time and completely turn the crank one revolution before
installing next one.
Now it is time for the camshaft, thinking it was easy to do.
I used a floor jack handle to balance the camshaft after using cam
break-in lube on it. It went in fully and spun easily until the last
1/4" -1/8" of travel. It bound up a little. I did not
like it and called the machine shop. They said it should be fine,
but bring it back so they could check it out. Out comes pistons,
crank and bearings and off the block and cam go back to the machine
shop.
They claimed there was a small nick on the first camshaft bearing
and they shaved it down. The cam did turn better when I got
it back.
I reassembled everything back in the block.
All this time I was researching what others have done,
asking these experts, Dave (chwtkns1), Obi-Wan, Lindel
and others, many questions .
Of course Dave always stressed the oil modifying kit
and Nick's Timing Chain Thrust Kit. Thanks Dave.
Now since a lot of discussion was talking about timing
chains I opted for a Dynagear double roller timing set. It
is on order today.
I took the heads to the machine shop to get done. They
needed new exhaust guides and after $245 they look new and are also
painted black like the block.
During my first trip to the Junk Yard this season, I
found a GW in there. :-(
In the cargo area I found another "spare" timing cover
and a "needed" oil pan. The one from the 84 engine had large
flakes of rust falling off of it. I knew it was too thin.
I cleaned off the JY oil pan and found a pin hole in
it also. :-( Now my option was to either go new, buy
used from someone else which is a risk, or repair the JY one. Again
the latter won. I brazed up that hole, filled it with water to
check for leaks, degreased it, POR-15 primed it and painted it Ford
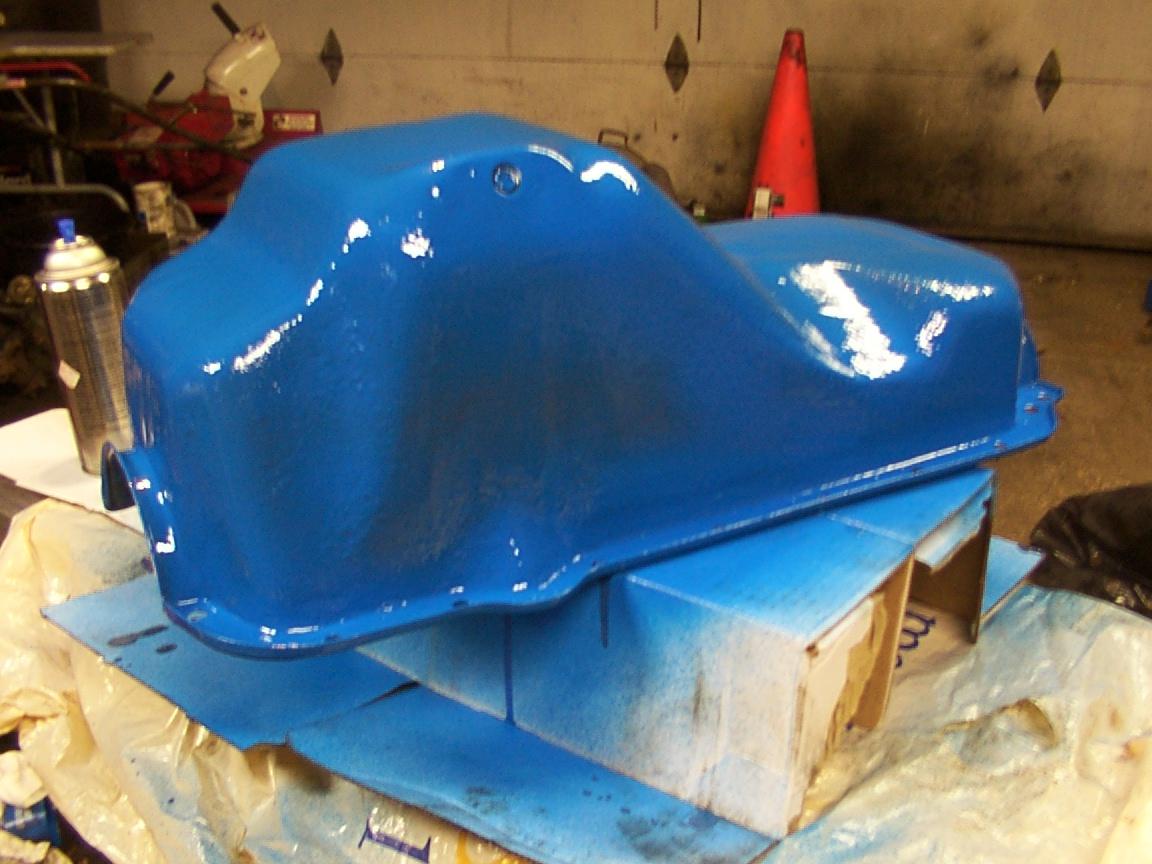
blue while the primer was still tacky.
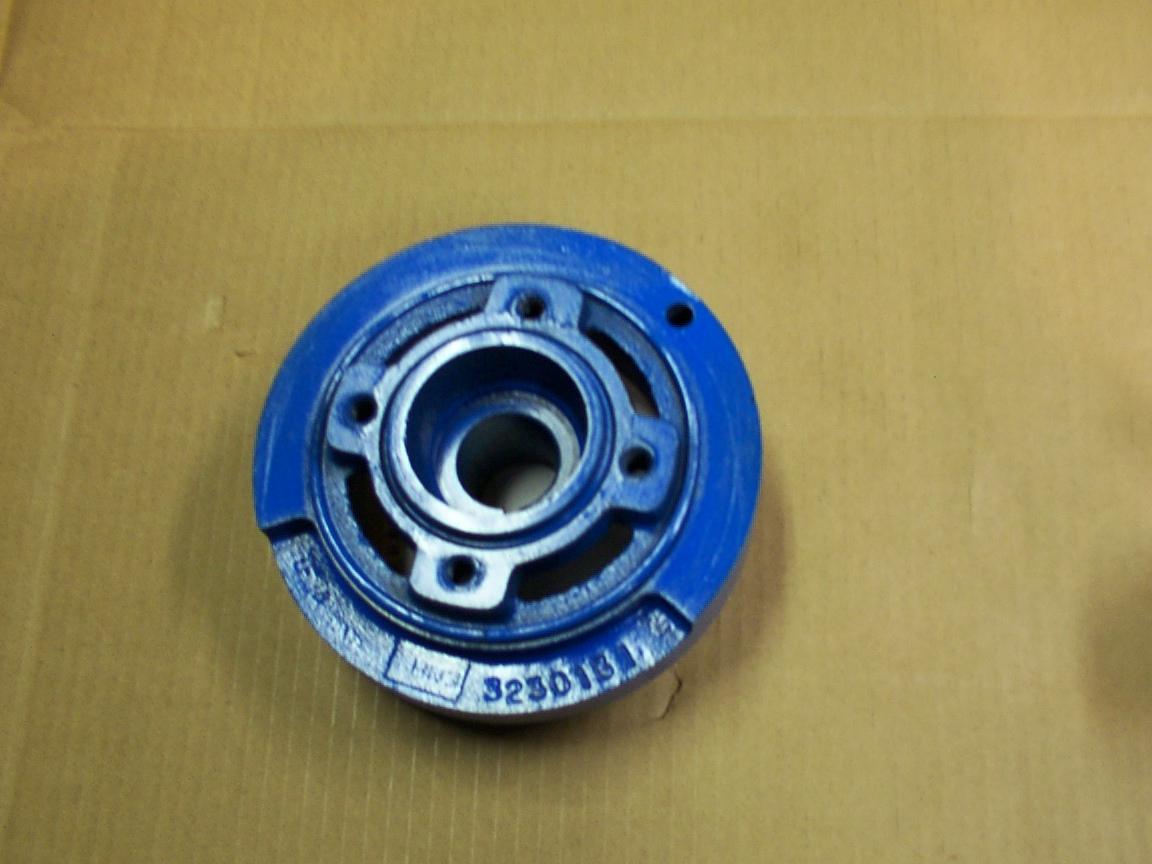
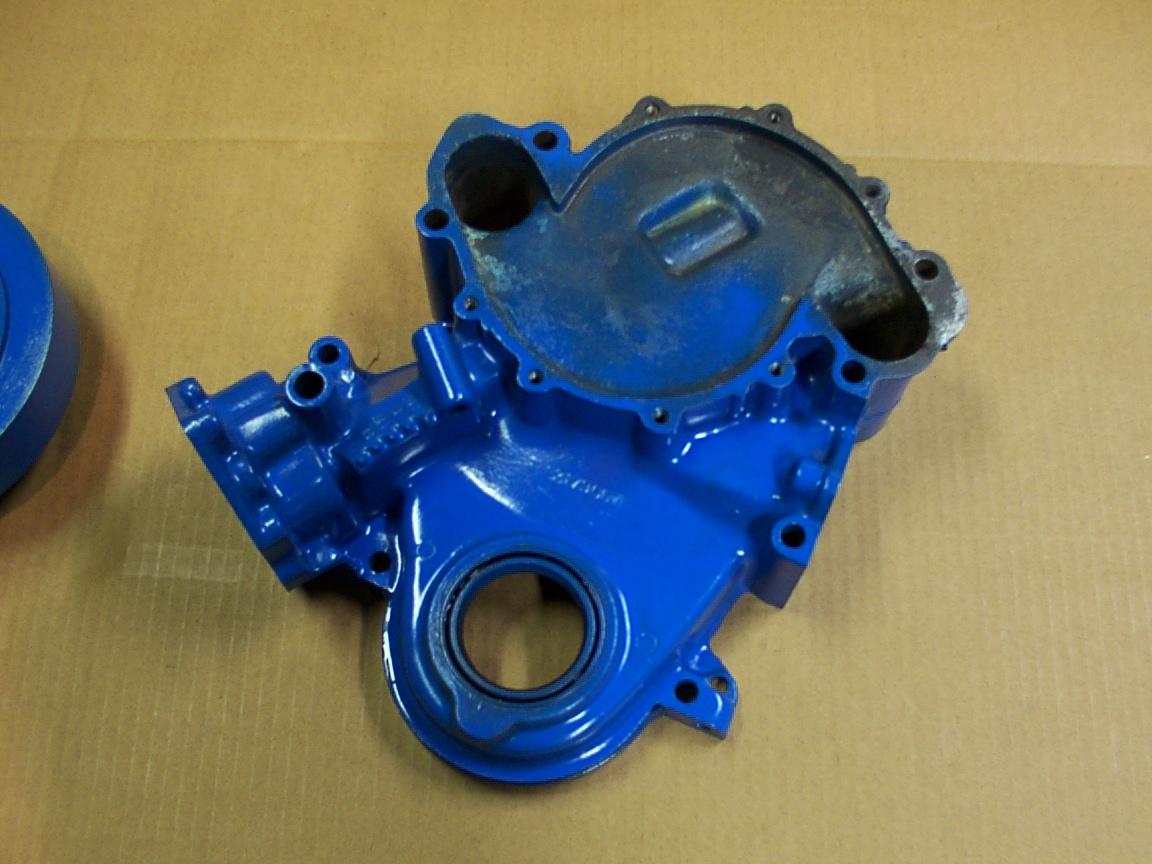
I cleaned, degreased and painted both the timing cover and harmonic
balancer the same Ford Blue. The oil housing of the timing cover
seems almost perfect with no scoring. I will reuse the oil gears.
I have a VW buddy that works at a Jeep dealership and he ordered
a new intake valley gasket, oil pressure sending unit and dipstick
tube for me at his discount.
As of Dec. 23, 2002 my parts from my buddy came in, but
I am still waiting for my double roller timing set to come it. This
will delay my installation date of Dec. 31st., but I am not really
in a rush. I consider this my XMas present to myself. :-)
Dec. 27, 2002 I called up the auto store and found out
that Dyna-Gear was purchased by Cloyes and my item was not shipped
yet. I canceled and ordered at another store. Part came
in on Monday and I installed timing set, new front crank seal, timing
cover on Tuesday along with the cylinder heads. NO I did not forget
the oil slinger on the crankshaft.
The harmonic balancer went on also. It probably needs
the sleeve, but I feel the groove, that is common, was not that bad.
Time will tell and so will any oil leaks. <g>
During the course of installing a new dipstick tube it cracked.
I used an open end wrench that fit tightly on the tube and tried
to tap it down with a hammer. I ordered two more, just in case
I encounter more problems. I also contacted experts on the FSJ list
and one person even told me that there is supposed to be a seal for the
tube. ???? First I have heard of it.
Someone also recommended I use the open end wrench trick,
place a bar on the tips of the open end wrench and tap the bar with
a hammer. Hmmm we shall find out!
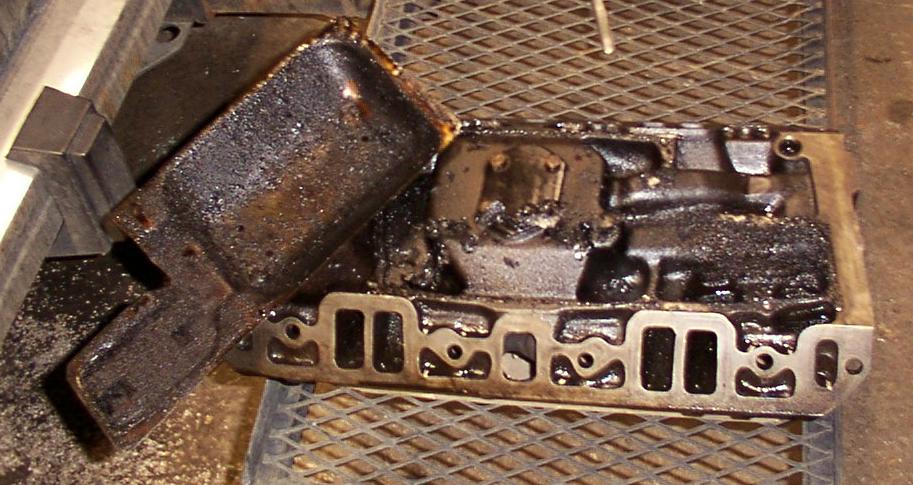
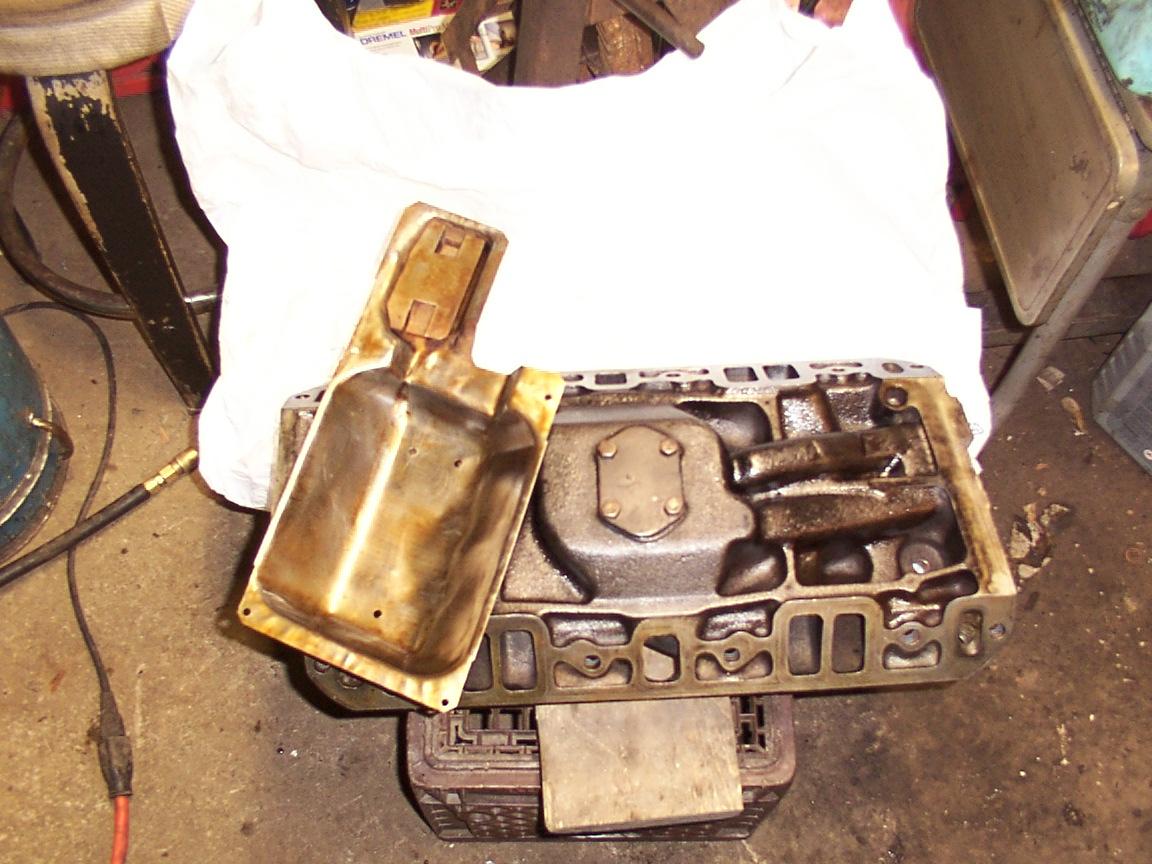
BTW The oil pan has not been installed, it is just held on
by a few bolts.
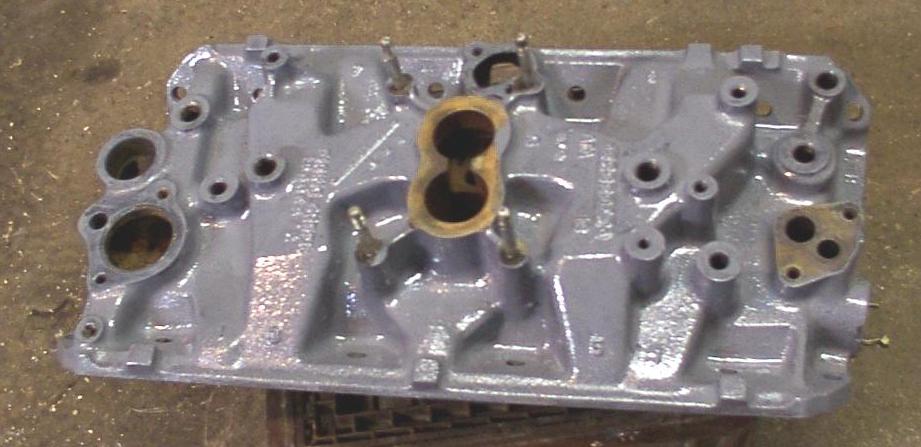
Cleaned up the intake manifold by removing all items on
it including the lower tray. I had to drill out the rivets
to get all of the gunk out of it and then install it with new wide
head rivets after oiling bottom and other surfaces that were not getting
painted. Then I painted the top with POR-15 in a gray that should
match the POR exhaust manifold gray paint. Dave at Imperial Restorations
gets me POR products next day.
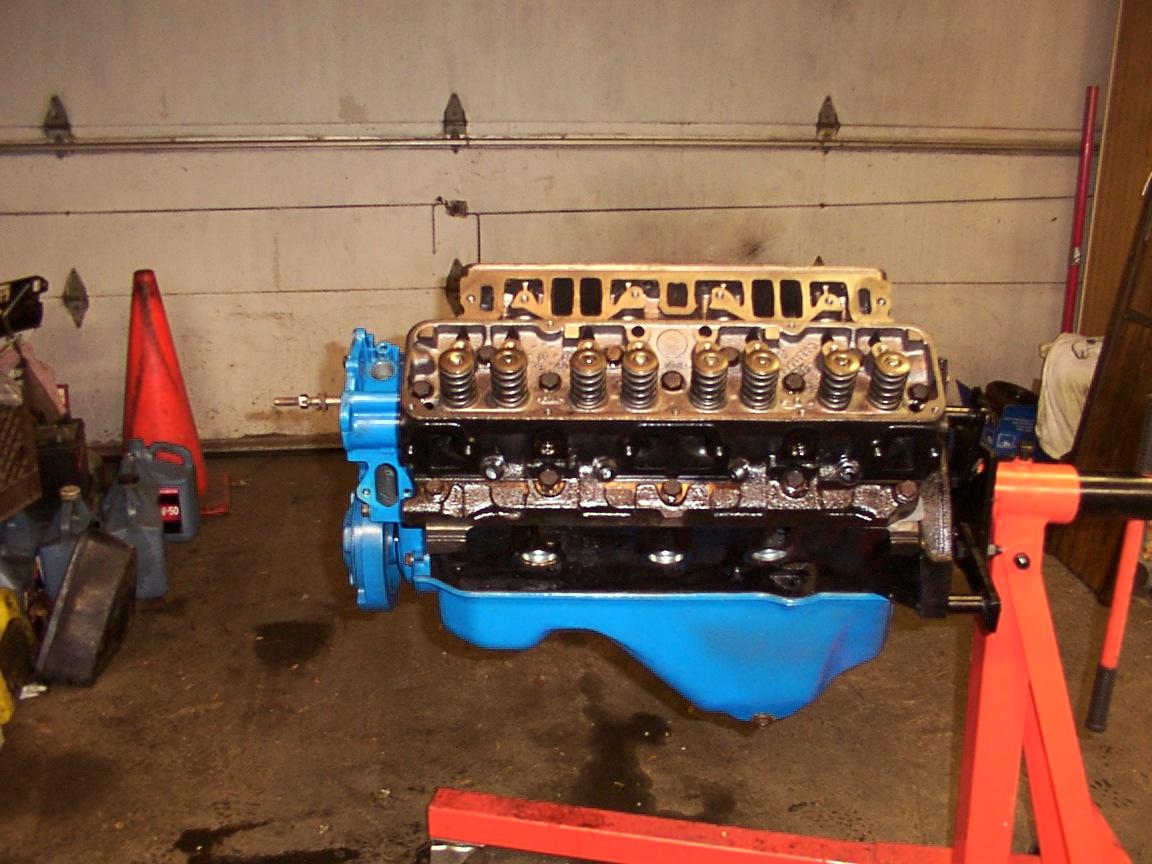
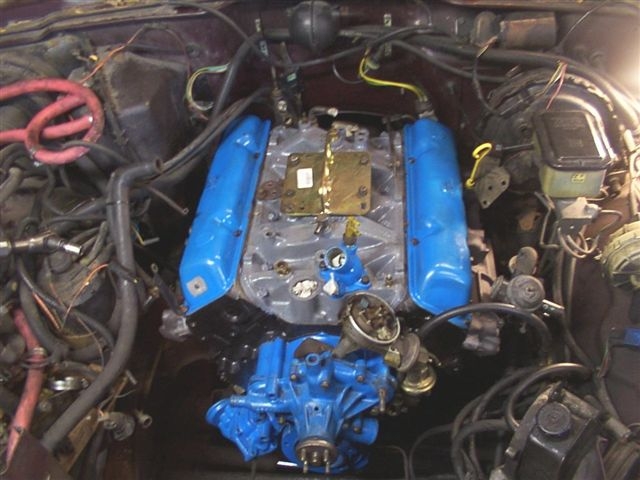
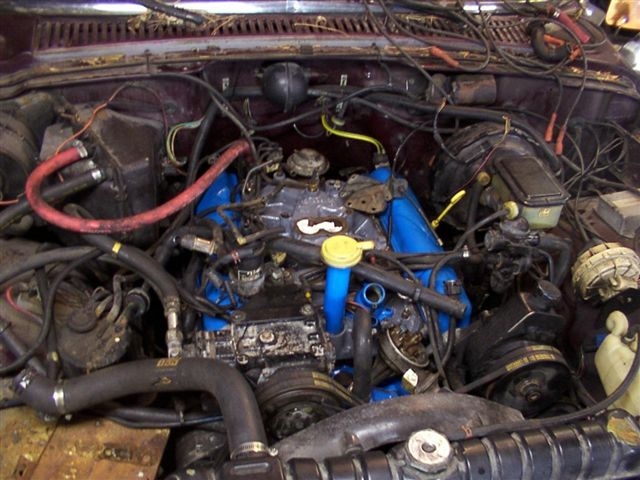
Ahhh the completely painted engine finally being installed.
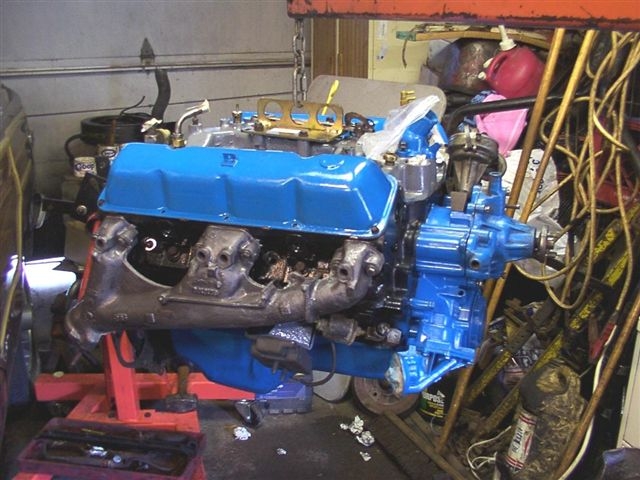
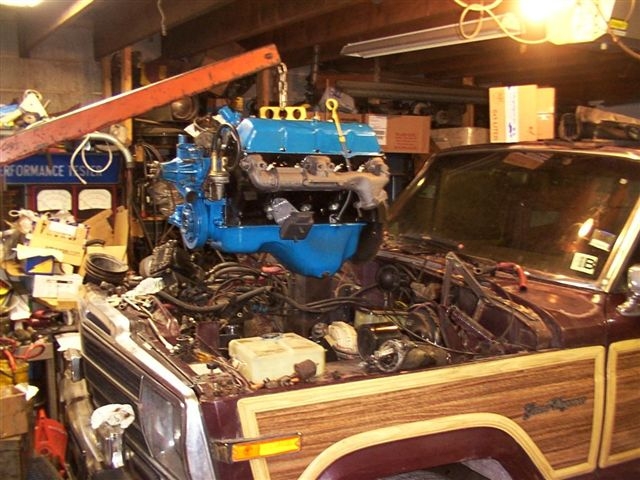
Notice that I am using a intake manifold adapter that replaces the carb temporarily. Thanks Tom C for the suggestion, I did not want to use a chain again and scratch up any paint, and that adapter made the engine very balanced. Installing that engine in there was not too bad by myself, but it should be a two person job. You don't want to damage anything like the windshield or your fingers.
Breaking in that cam is the scariest part of this job. Start it up and take the revs up and hold them there! WOW that does not let you sneak up on starting process. Of course you will fill the engine with oil first, remove the distributor and prime the engine with oil using some adapter attached to your drill. I had a spare distributor that I took the timing gear off of and it could spin the oil pump.
Got it started after I reinstalled the ign. distributor 180 degrees. Everything was going well for the first 12-15 minutes and then the engine shut off. OMG what happened!!! I looked at the fuel gauge and it read 1/4 full, but it was either not accurate or was not picking up fuel from the bottom of the tank. Off to the gas station to buy a few more gallons. After the fuel made it to the carb, I broke in the cam for the last 10 minutes or so. Not bad since I expected the exhaust manifolds or catalytic converter to glow red or maybe some strange noises.
Installed a rear Class III hitch, tightened up the rear output shaft of the transfer case.
Drove it for about 2 years, did not fall in love with it and only put a few hundred miles on it. I collected some spare parts for it, had a HEI distributor custom machined for it but never installed.
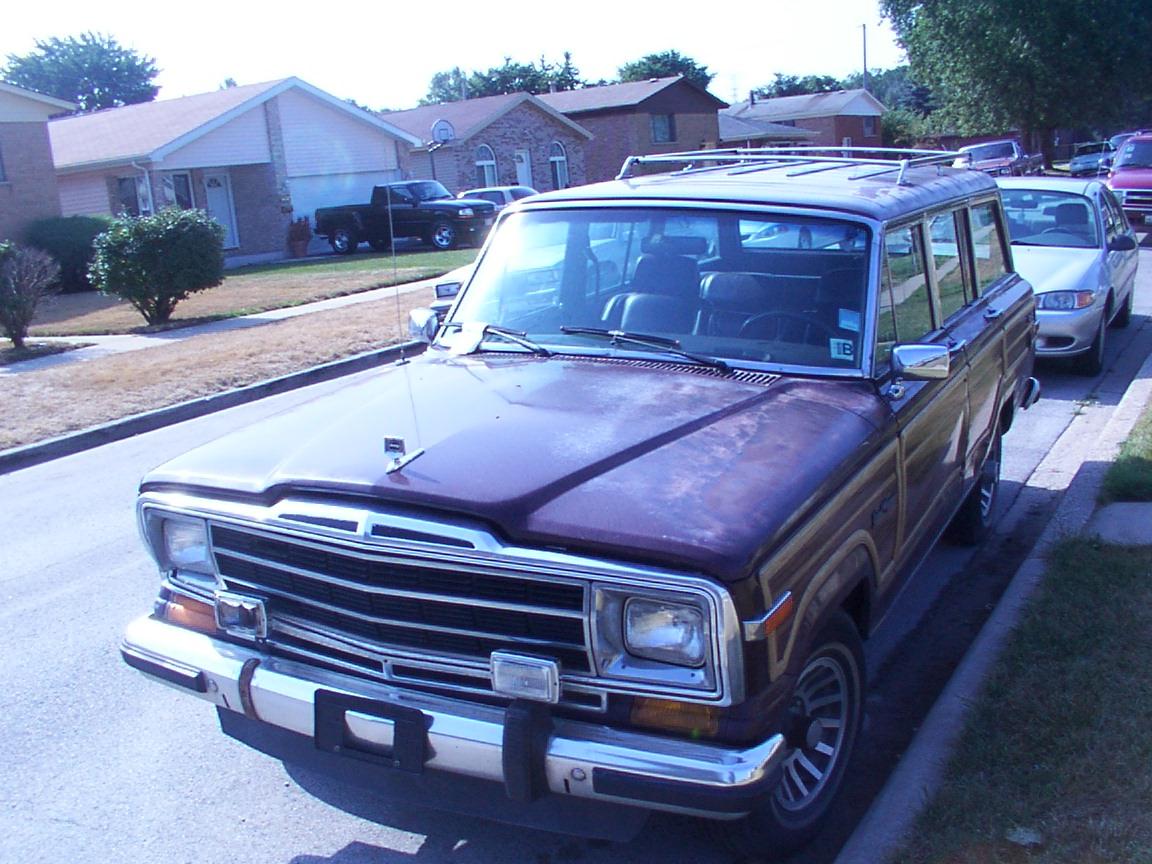
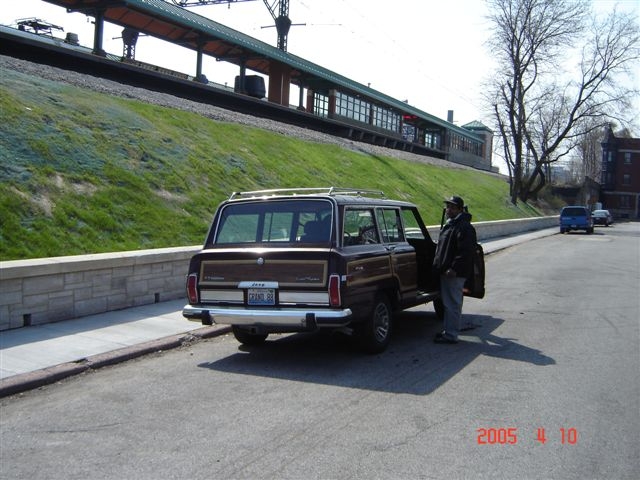
Someone offered me some good money for it and I sold it! I still see it to this day.
Here it is on my last day of ownership. The new owner is in the driver's seat and her mechanic was rechecking everything out. Notice my plates. ;-)
created with Netscape Composer
pictures taken with Kodak DC-3200 digital camera.
VISITORS